DVD CONVERSION
DVD’s can take up an extremely large amount of space on your hard drive so they must be converted to a different format. There are several formats that they can be converted to. MPEG, AVI, VCD, DivX.
For this tutorial we will be converting to AVI format with a DivX codec. A codec is a set of instructions that tells your pc how to encode the movie. DivX quality can be comparable to DVD depending on what bitrate you encode at. You can make a movie small enough to fit on a single CD but the quality may not be to your liking. I have found that for a regular length movie to have good quality, the finished work will be between 900MB to 1.3gig. This is much better than the 4-8gig that we begin with.
The tools that you will need for this job are:
DivX 3.11 codec (NOTE: DivX4 is available but is not compatible with 3.11)
We will be using the Radium MP3 codec to encode the sound for our finished movie. Once this is installed and configured, you won’t have to touch it again. It will automatically be incorporated into Flask MPEG.
The DivX 3.11 codec will be used to encode the video. As mentioned earlier, it is not compatible with DivX4. DivX4 is also called the Mayo Project. It is a codec that has been created by many contributors. To make a long story short, if you only have DivX4 on your system and try to play a movie encoded with DivX 3.11, you will only get audio. We’ll use version 3.11 because it is proven to be stable.
The Advanced Bitrate Calculator will be used to calculate what bit rate we’ll encode our movie at. It takes into account factors that we specify such as: MP3 quality, original movie length, and maximum amount of disk space we want to use.
Flask MPEG is what ties these all together. It will do the encoding of audio and video using the codecs we specify. We can also change the size of our picture. Many DVDs have the black bars at the top and bottom of the movie because they are filmed at a 16:9 ratio and are meant to be watched on a wide screen television.
Once you have each of these tools installed we can get started.
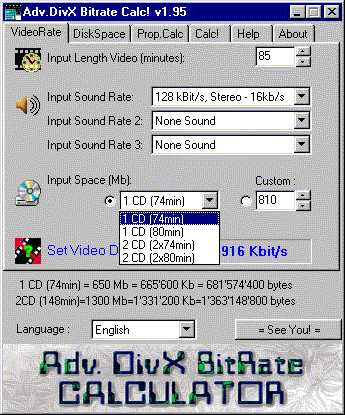 Start up the Advanced Bitrate Calculator.
We need only be concerned with the first tab.
1. Adjust the length of the movie. This info should be on the box.
2. Adjust the setting for Input Sound Rate. For CD quality stereo sound use 128kbs or greater. For 5.1 channel dolby digital sound, use 320kbs or greater.
3. Next you have to decide how much space you want to use. Do you want to fit the movie on one CD or 2 CDs? Or select a custom amount of hard drive space. In my opinion, for a good quality movie, the target bitrate should be greater than 1100kbs.
4. Once you have calculated the desired bit rate, remember it. You’ll need to enter it into the Flask MPEG application later.
 Start up Flask MPEG. Your initial screen will look as follows:
- Select File, Open and go to the location of your ripped movie files. Select the file named ‘Vts_01_1’. Flask MPEG will automatically select all available files for your movie. Two windows will appear: A large viewing window and the Flask Control Panel.
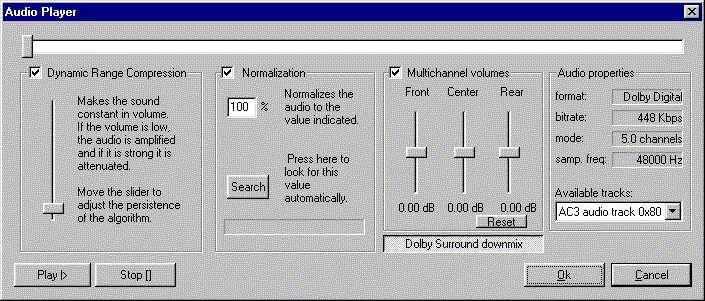
- In the Flask Control Panel, left click on the ‘Audio Player’ button. See the results below. You can use the Dynamic Range Compression to adjust the sound volume of the movie. Check off this field.
- Hit the Play button and adjust the slider to attain your desired audio level.
- Check off Normalization and change the percentage to about 90%. You can vary this to your liking as well.
- Check off Multichannel Volumes. I usually leave the sliders around half way.
- The available audio tracks can stay at the default. Many DVDs have multiple audio tracks for other languages.
- Click on OK to save these settings.
Next, click on the configure button. There are several tabs here that we will need to change.
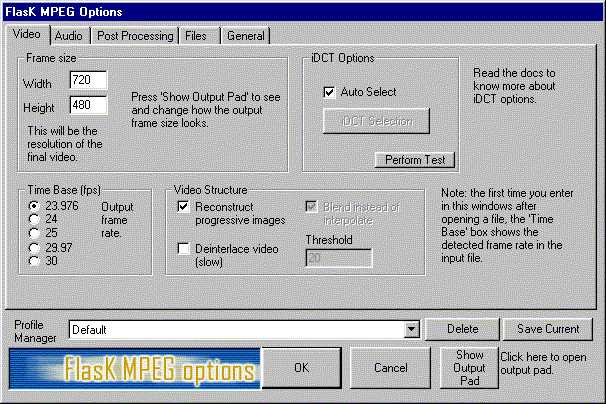
- Frame size can be set at whatever size you want the movie to be viewed at. This setting works fine, but many people prefer other sizes.
- Leave iDCT Options selected.
- Time Base or Frames Per Second should be set at 29.97 or 30. In North America, videos are usually at one of these two rates. You may want to encode a few minutes and see if the sound is in time with the picture.
- Nothing has to be changed in the Video Structure section.
- Click on the Show Output Pad button. A screenshot of the movie will show in the window. You can use the + and – buttons at the top left of the screen to crop the picture left to right and top to bottom. If you don’t mind the black bars at the top and bottom, don’t change these settings. Once you have this set the way you want it, click the hide button.
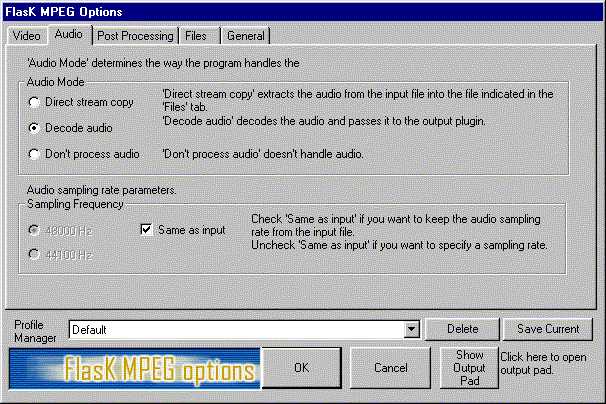
- Ensure that Decode Audio is checked off, as well as Same as input.
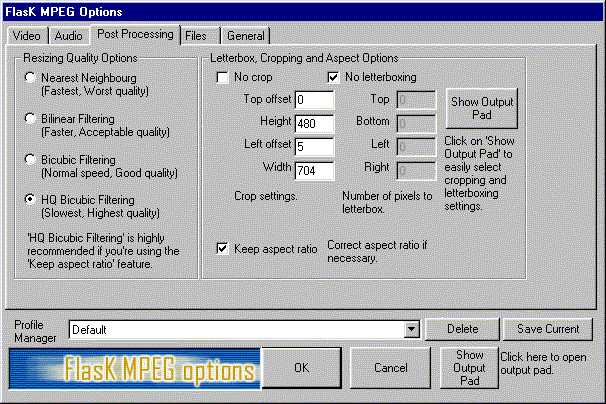
- Ensure the Resizing quality is set at HQ Bicubic Filtering for highest quality.
- Make sure you check off Keep aspect Ratio. This will ensure that your picture isn’t distorted.
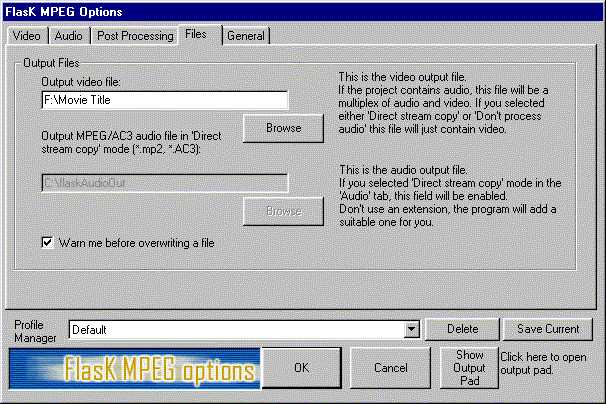
- On this tab, you only need to specify a name and location for your finished product.
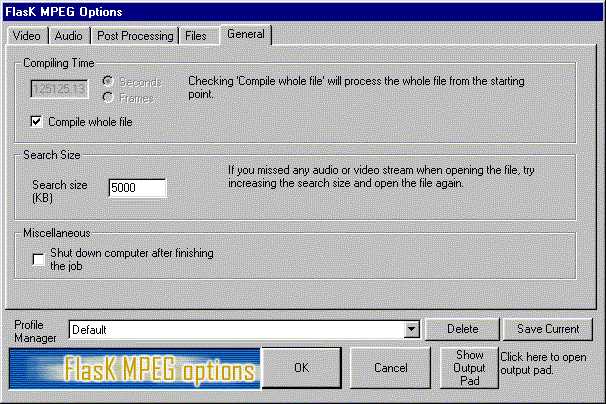
- This tab is where you specify if you want the whole file encoded or just a few minutes to test the Frames Per Second setting.
- The other settings here should be fine. You can have Flask automatically shut down your PC when it is finished the encoding if you want to by checking off this box.
- Click OK.
In the Flask Control Panel, click on the Select Output button and select AVI Output. Click on the Select Output Button again and then Configure Output Module.
This will bring up another window called Aviplugin 0.58 Config.
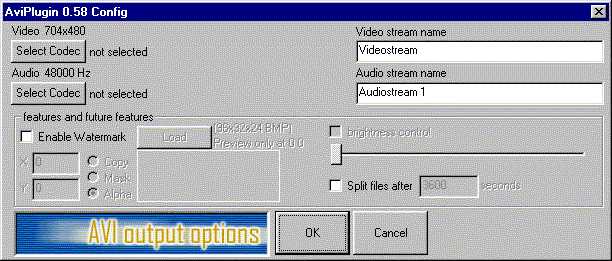
- Click on Select Codec for Video. There are two items that we are concerned with here: DivX :) MPEG-4 Low Motion and DivX :) MPEG-4 Fast Motion. For most movies we can select the low motion setting. If you are encoding a sports game or similar you might want to experiment with the fast motion setting.
- Click on the Configure button.
-
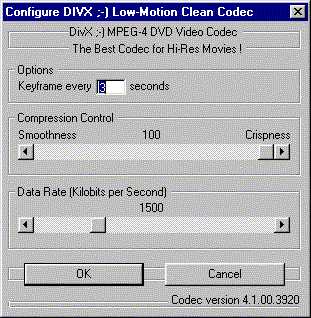 The keyframe option can be set to whatever you want.
If you hit forward on your video player it will jump this many seconds each
time. I find that 3 is nice.
The keyframe option can be set to whatever you want.
If you hit forward on your video player it will jump this many seconds each
time. I find that 3 is nice.
- Compression control – you can experiment with this. I find that 89 gives good quality.
- Data Rate – This is where the Advanced Bit rate Calculator comes in. Change this setting to a similar value that you calculated earlier. This doesn’t have to be exact, within 10 or 20 kbs is fine.
- Click OK.
- Click OK a second time.
-
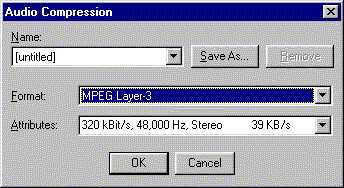 Click on Select Codec for Audio.
- Change the Format to MPEG Layer-3.
- Select the bit rate for Audio. CD quality stereo sound starts at 128kbs. For 5.1 channel digital sound, start at 320kbs and up. NOTE: The higher this rate is, the larger your finished product will be. You have already accounted for this in the Bit rate Calculator earlier, so it shouldn’t be an issue.
- Click OK.
The rest of the settings should be fine. If you want, you can put a watermark overtop of the video to let people know you encoded it, but it just takes away from the movie quality. Hit OK to return to the Flask Control Panel.
Click on the Flask It button to start the encoding process. Depending on memory, processor speed and movie length, this could take from 5 to 20 hours, so you might want to let it run over night.
Once complete, play your finished movie and fast forward to near the end to ensure that it is the quality that you want and the sound still matches the picture. If it off a little, you will have to re-encode with a different frames per second setting. If it is fine, Congratulations! You can now delete your original ‘ripped’ files that are consuming your hard drive.